


This article assumes you are already familiar with: PHP, Composer, NPM, local LAMP stack development and the UNIX command line. If you're unsure about what development environment to use, I recommend a pre-configured environment such as devilbox or laragon. These environments include most commonly used dev tools for LAMP stack development. As the database is only used for local development we will use sqlite for the database layer. This eliminates the need for a database server such as MySql.
Prerequisites
- Composer
- PHP
- Node and NPM/Yarn
- Firebase account (sign up here)
New Statamic Site
We start by creating a new Statamic project. If this is your first time building a Statamic website please familiarise yourself with the official documentation. Navigate to your projects folder in the terminal and enter:
$ composer create-project --prefer-dist statamic/statamic super-groovy-blog
Now generate the app key with the command:
$ php artisan key:generate
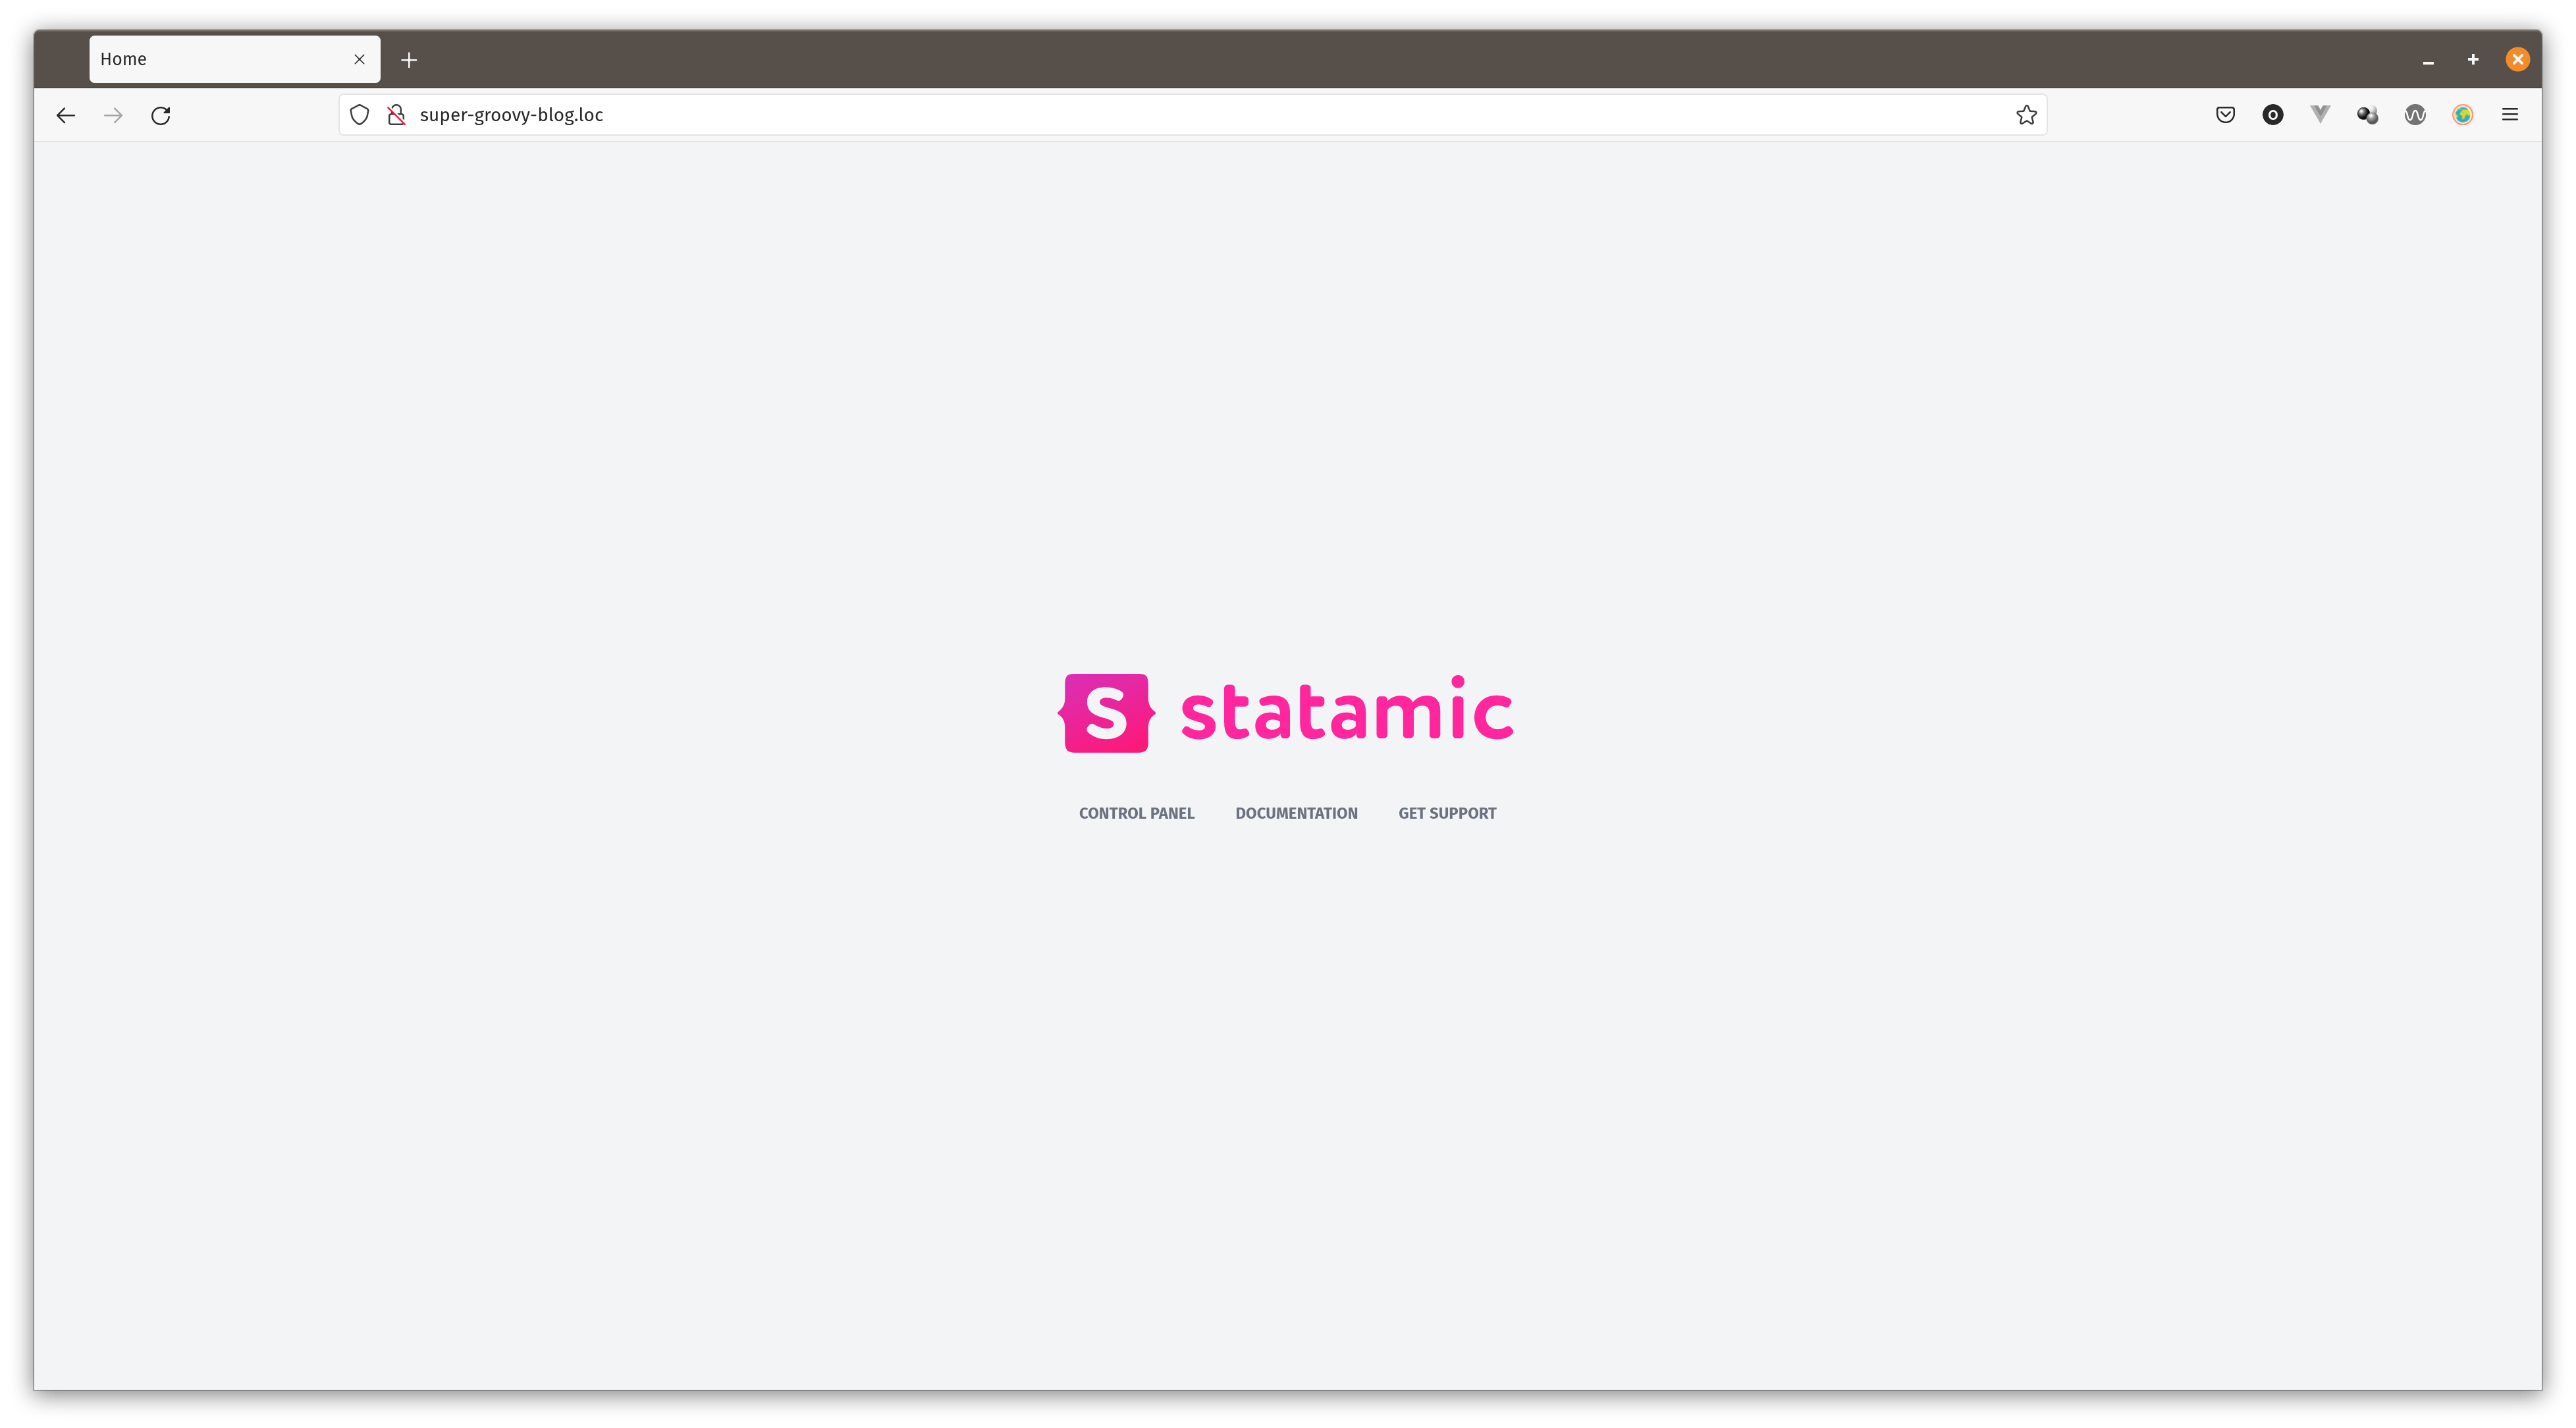
If you visit the app in your local server you should see the Statamic start up page:
Copy the .env-example to a new file called .env and adjust the following properties:
APP_NAME=super-groovy-blog
...
# the local app url will likely have a different extension for you
APP_URL=http://super-groovy-blog.loc
Using a Starter Kit
Rather than building the blog from scratch, we will use a starter kit. Starter kits come with pre-built functionality and styles. This will allow us to focus on generating the static site and deploying it. Cool writings is a free blogging starter kit, perfect for this exercise. You can view all the available starter kits at statamic.com/starter-kits.
Download and install the starter kit with the following command (The clear-site flag will clear any existing content so omit this flag if you want to preserve any content.):
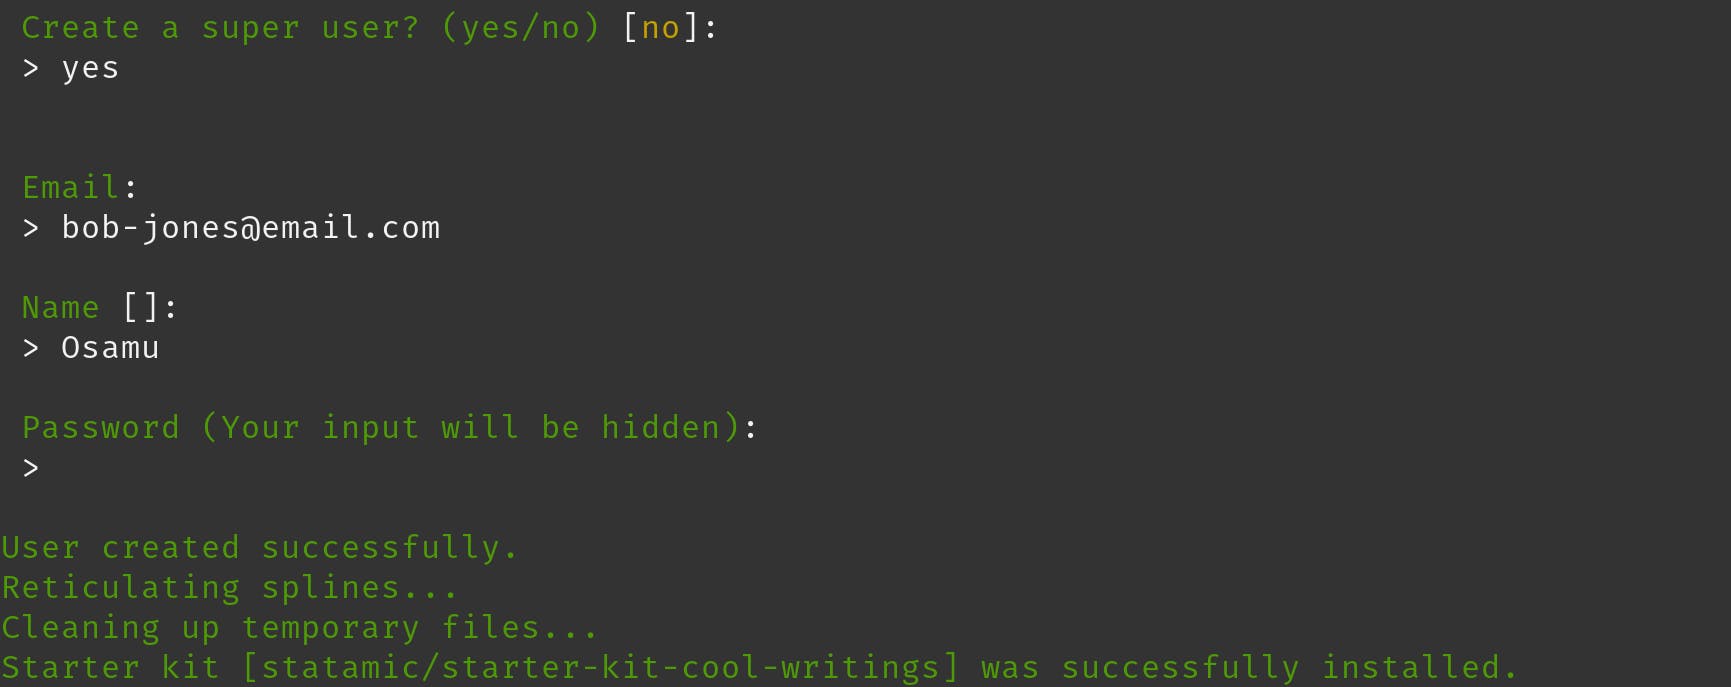
$ php please starter-kit:install statamic/starter-kit-cool-writings --clear-site
You will be asked if you'd like to create a super user during the installation process. Type yes and fill in the details. You will need these login details to create and edit content through the control panel.
Install and compile the front end dependencies:
$ npm i && npm run dev
If you'd like to make changes to the styles or functionality run:
$ npm run watch
Now the website on your local server should match the preview of your chosen start up kit.
Add your own content (optional)
The cool writings start up kit ships with place-holder content so this step isn't strictly necessary. If you would like to add some of your own content navigate to /cp on your local site and login with the user details you created earlier. Navigate to Collections -> Articles and click on Create Entry.
Fill out the title, content and excerpt and click save and publish. You should be able to view your new article on the front end of you website.
Install and configure Firebase
Create a Firebase Project
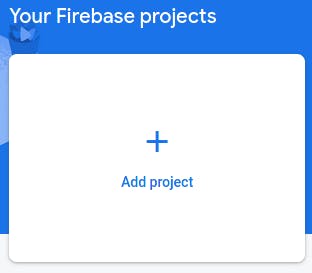
Go to the firebase console after signing in and add a new project.
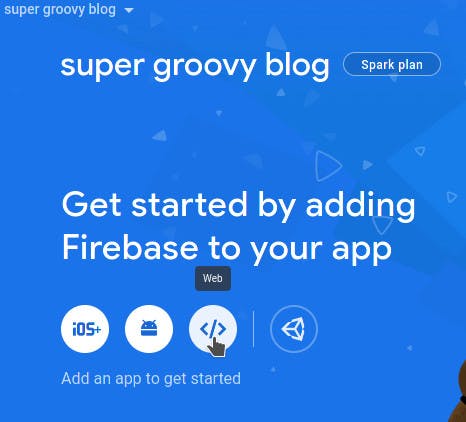
Give your new project a name and initialise the project. You can enable google analytics if you wish.
Add Firebase to the project
Now you need to add Firebase to the project. In the project overview click on the web app icon:
This will open a window listing the required steps. Give your website a nickname and check set up firebase hosting:
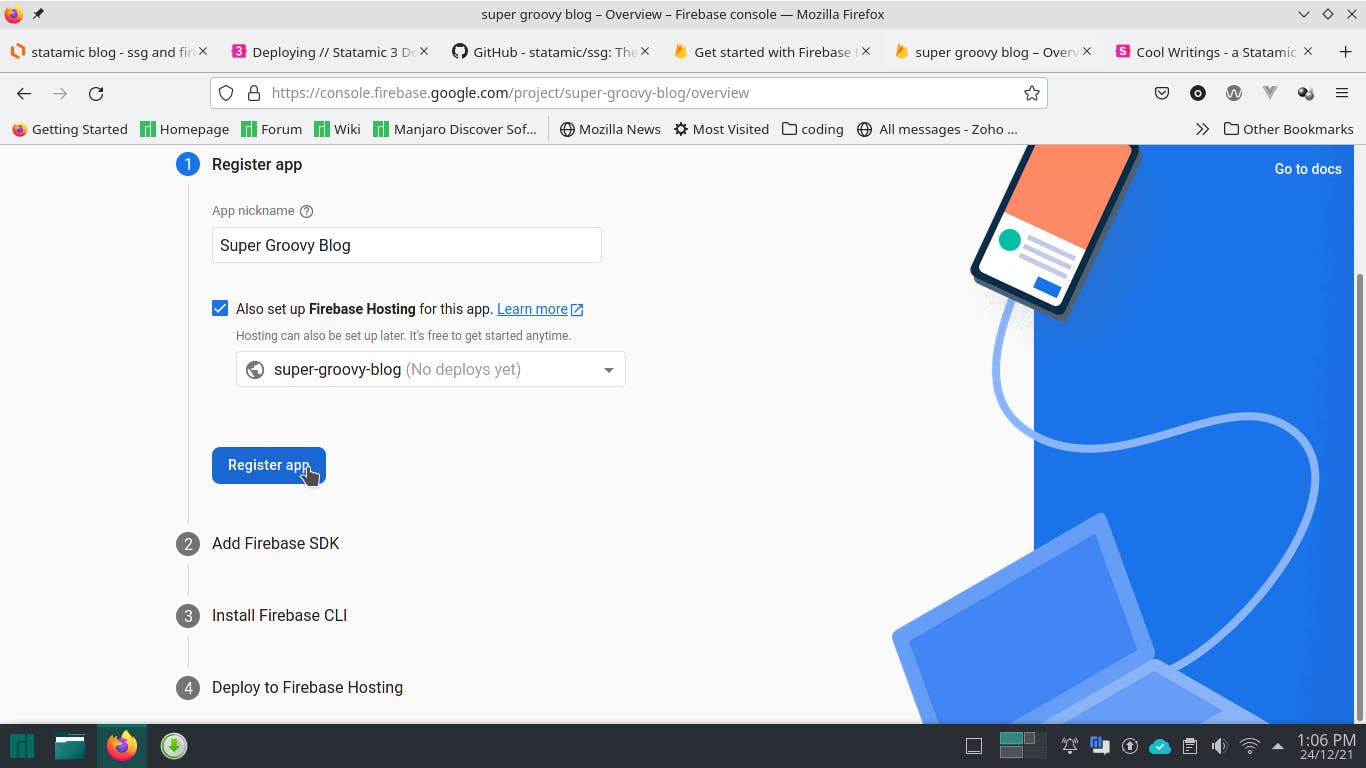
This will set up a domain with the nickname. You can edit the url here if you like. Once you've clicked the register button, leave the window open and open your terminal in the root of your project.
Install Firebase SDK
Install with NPM:
$ npm install firebase
Open site.js in resources/js and paste in the configuration code. This will be unique to your application:
// Import the functions you need from the SDKs you need
import { initializeApp } from "firebase/app";
// TODO: Add SDKs for Firebase products that you want to use
// https://firebase.google.com/docs/web/setup#available-libraries

// Your web app's Firebase configuration
const firebaseConfig = {
  apiKey: "xxxxxxxxxxxxxxxxxxxxxxxxxxxxxxxxxxxxxxx",
  authDomain: "super-groovy-blog.firebaseapp.com",
  projectId: "super-groovy-blog",
  storageBucket: "super-groovy-blog.appspot.com",
  messagingSenderId: "xxxxxxxxxxxx",
  appId: "x:xxxxxxxxxxxx:web:xxxxxxxxxxxxxxxxxxxxxx"
};

// Initialize Firebase
const app = initializeApp(firebaseConfig);
Login to Firebase and initialise the hosting
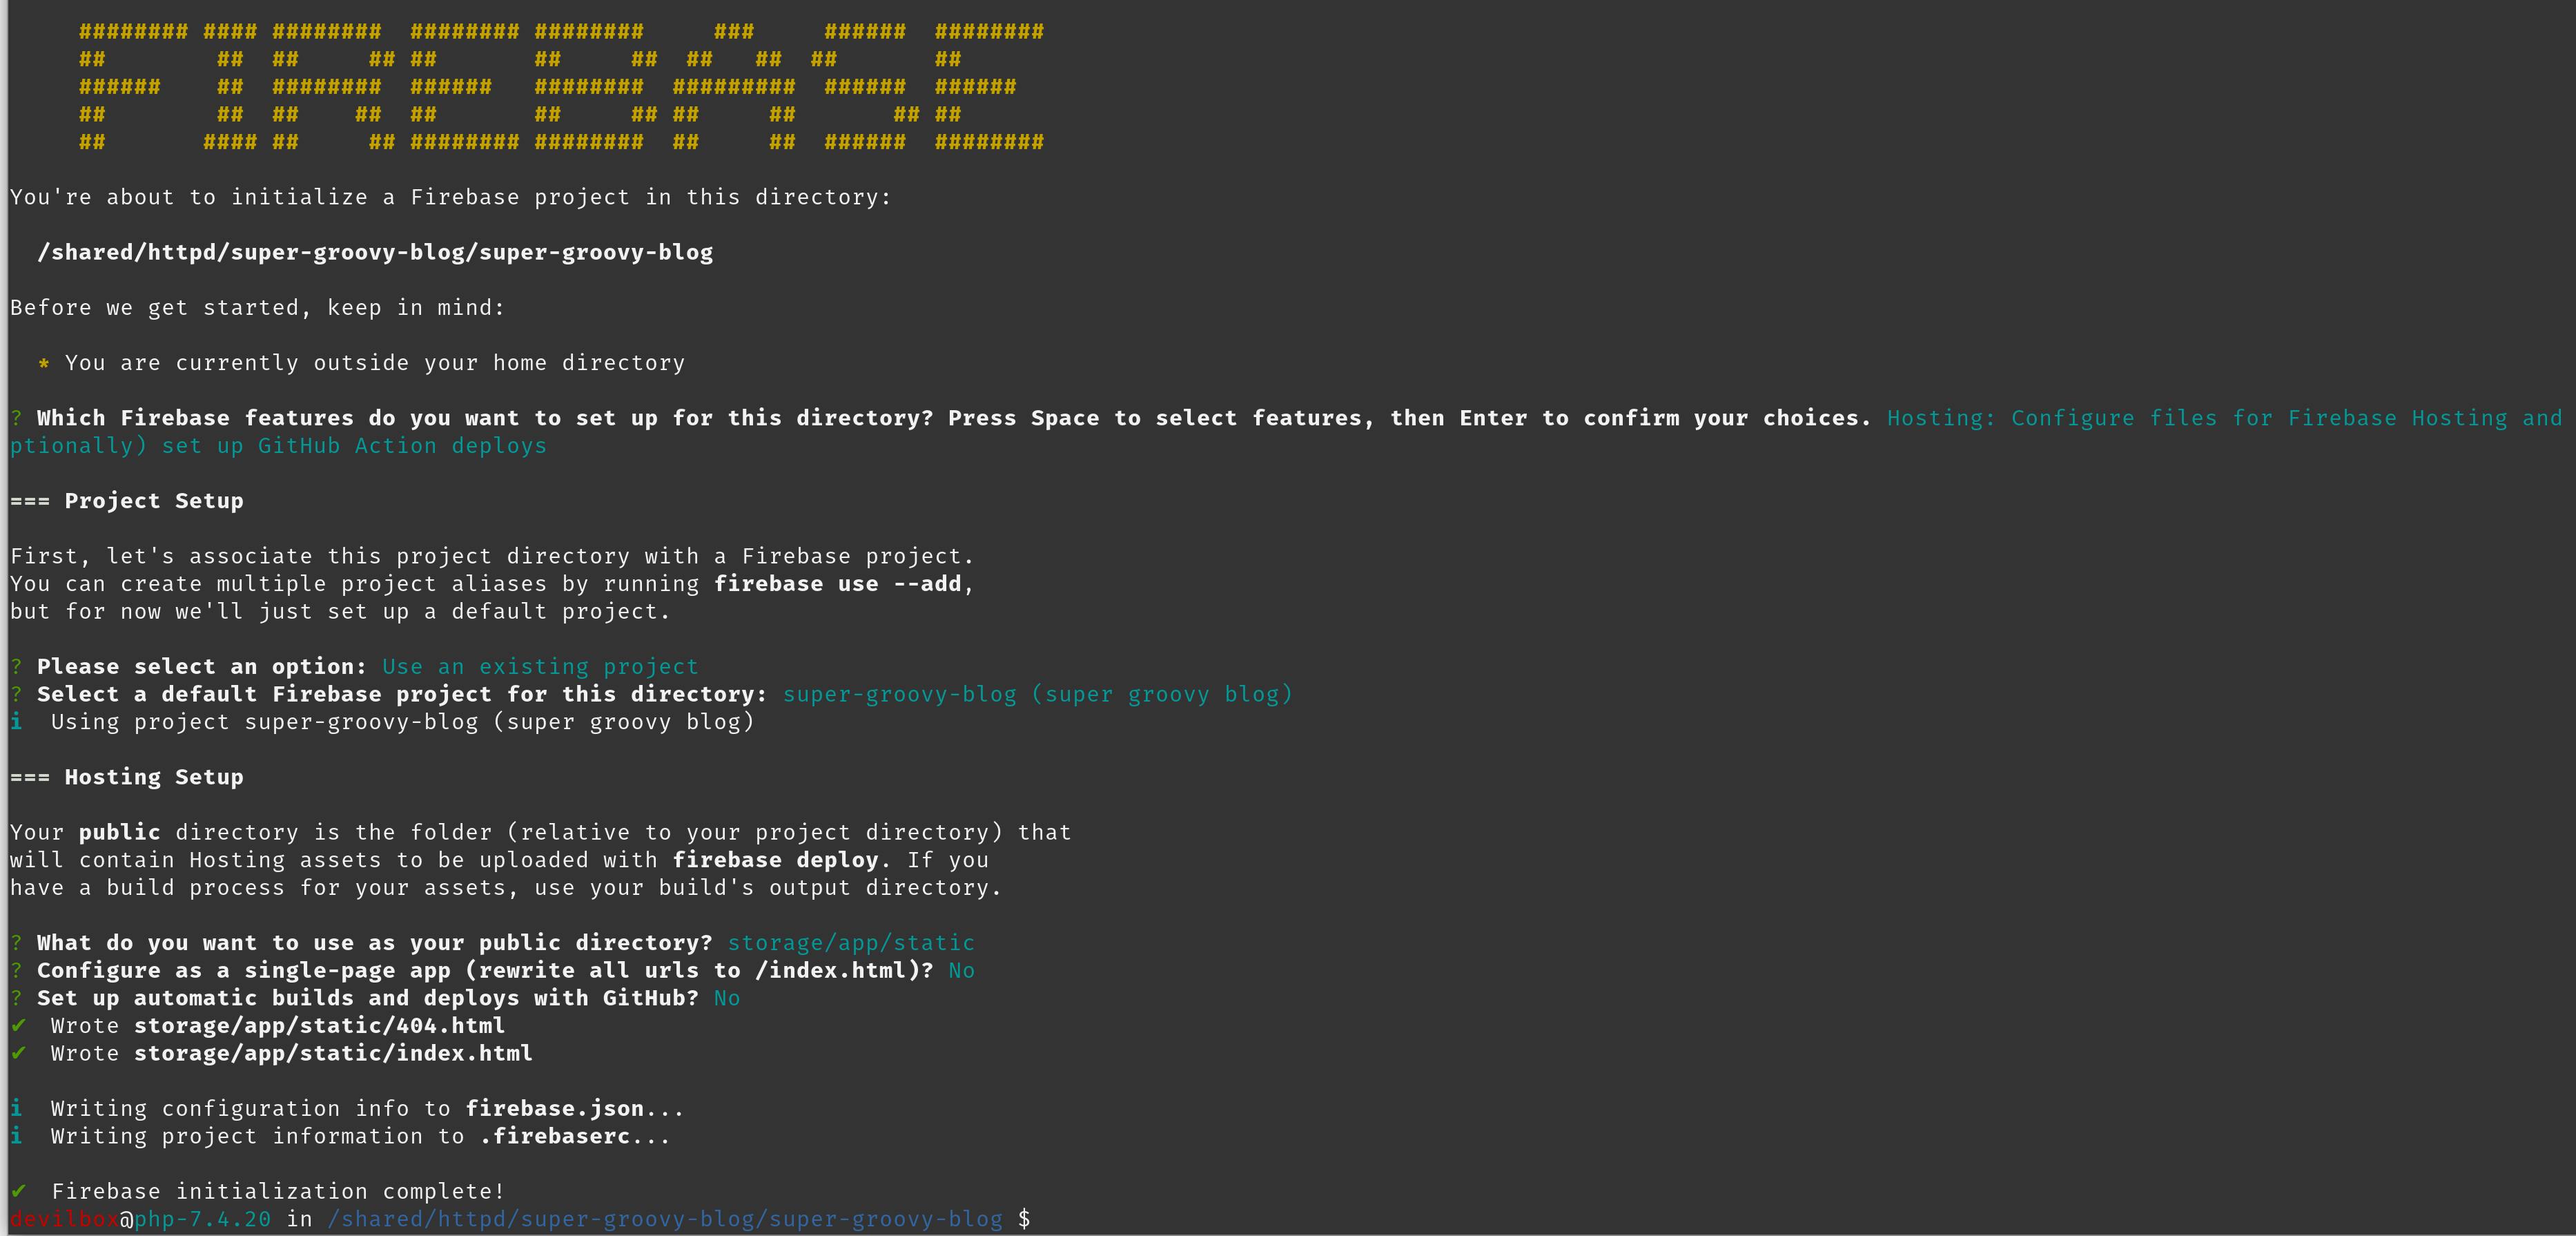
First install the Firebase CLI:
$ npm install -g firebase-tools
Then login to firebase:
$ firebase login
Visit the generated url to login to firebase.
If the localhost redirect doesn't work use the --no-localhost flag:
$ firebase login --no-localhost
and copy the API key into the prompt. Now you can initalise hosting:
$ firebase init
You will be prompted to choose which firebase features you'd like to set up. Select Hosting: Configure files for Firebase Hosting and (optionally) set up GitHub Action deploys.
Select Use an existing project when prompted and choose your newly created project from the list.
Type in storage/app/static when prompted to choose a project directory.
Type n when asked if you'd like to set up the app as a single page app and if you'd like to set up github actions. Firebase is now initialised.
Double check that the public option in your firebase.json is set to storage/app/static. This is where the static site files will be generated.
Generate static site using SSG
Install SSG
$ composer require statamic/ssg
Configure files and assets
Now we need to make sure that all the correct files are being included in the static site folder. To do this we will need to publish and edit the SSG config file. Publish the file first:
$ php artisan vendor:publish --provider="Statamic\StaticSite\ServiceProvider"
Then open ssg.php in the config/statamic/ directory. Edit the copy array (around line 41) to map the required files to the correct destination folders. :
'copy' => [
    public_path('css') => 'css',
    public_path('js') => 'js',
    public_path('assets') => 'assets'
],
Your configuration may look different depending on the starter kit you chose.
Create a pre-deploy script (optional)
Firebase allows us to run bash scripts both just before and after the deploy action. This following script will tell firebase to regenerate the static site files whenever it deploys. It's not strictly necessary, but is easy to achieve and is worth knowing for future reference.
Add the following to firebase.json after "hosting": {:
"predeploy": "php please ssg:generate",
If you don't add this predeploy script you just need to run the php please ssg:generate whenever you deploy the website.
Build and deploy
Now that we've got everything configured correctly we can deploy the site to firebase! Simply run:
$ firebase deploy
in the project root. Go to the Hosting URL (this should appear in the terminal after you deploy) to see your new blog!
I hope you found this article informative and easy to follow. Feel free to leave feedback in the comments.s